Search
Categories
"photo essay" #hdmoment #shuttersisters #sscolormonth #ssdecember #sselevate #ssmoment #thewrittenwords abstract adventure aperture archives art autumn babies beauty black and white blur bokeh books business camera bags camera gear cameras camp shutter sisters celebration, change childhood children cityscapes classes color community updates composition contests crafts creativity creatures details diptychs discovery documentary documentary dreams elevate equipment events events events everyday exposure expressive photography fall family fashion featured products film flare flash focus food found words found words framing fun gallery exhibitions gather giveaway giving gratitude guest blogger healing heart holidays holidays holidays home inspiration instant interviews interviews introspection iphoneography iso jump kitchen landscape landscapes laughter leap lenses life light love love macro mantra medium moment moments moments, mood motherhood motion muse nature nature negative space night photography Oasis one word project patterns perspective pets photo essay photo prompts photo walk, picture hope place places play poetry polaroid portraiture pov pregnancy presets printing process processing processing project 365 reflections savor self self-portraits sepia series shadow shop shutter speed simplicity sisterhood skyscapes soul spaces sponsors sports spring step still life stillness stillness story storytelling, inspiration style styling summer sun table texture thankful time tips tips, togetherness travel truths tutorial urban, video vignettes vintage vintage effects visual poetry water weather weddings weekend weekending windows winter words workflow you

archived posts

Entries in aperture (16)

Monday
Feb092009

The Blur Between Moments

Like most of you, I often seek out my children as subjects for creative inspiration. Naturally I have a healthy dose of smiling faces, but I'm finding that the images that mean the most to me are those captured in between moments. When they've look away or shifted their focus to a place other than my lens.

I shot this image with my LensBaby Composer. What's cool about this lens is its bend-a-ability. So you grab the end of the lens (its "focus collar") and tilt it any way you like to selectively focus on a specific area of your composition. Here you can see I had it tilted towards the left and focused on my girls' eye, generating a bit of blur and distortion on the right side of the image. The lens comes with a collection of aperture disks to control the sweet spot (focus area). I used the default f/4 for this image and this wider view, making the size of the sweet spot smaller and giving me a larger blur area. Had I used a higher f/stop number (smaller aperture opening), less of the image would have been blurred.

Embracing the blur? Check this one I heart from Karen and this series of luscious blue blurs from Kate. Paige took her LensBaby for a walk here. And Tracey gave it a rest on her table here. Oh, and here's a cool one from Sarah-Ji. Show us your LensBaby Composer creations or any other images that celebrate the blur between moments.
Sunday
Aug032008

sunday school: fill-in-the-flash


I know that many of us here are natural light shooters who adore super fast prime lenses like the magical 50mm f/1.8 (or f/1.4 if you're lucky).  Let's see the hands of those of us who have raised our noses ever so slightly whenever witnessing someone using their camera's built in flash.  Now let's see the hands of those of us who would much rather embrace the blur than use a flash.  Yeah, I thought so, and my hand is in the air along with many of you. 

Considering that our chosen symbol for the sisterhood is a beautiful big old flash bulb, I've decided to make friends with my flash and to apologize for all those years of neglect and contempt.  And you know what?  I've actually found that our flash (even the built-in camera one) IS our friend, and that if you take the time to figure out its capabilities, you can take better photos.

One situation in which a flash as simple as the one that came with your camera will come in quite handy is when you are shooting in bright glaring sunlight.  Unless you're shooting exclusively in the shade, you will find that many of your shots have harsh shadows.  You can minimize this by using just enough flash to fill in the shadows especially if you are shooting into the sun.  This is a technique called fill flash.

I played around with my aperture, shutter speed and flash compensation to get the photo above with fill flash.  Without the flash, the photo would have looked something like this.  Pretty dull, huh?  For those of you who love shooting into the sun for that pretty sun flare, try using flash next time, especially if you have a person in the foreground with their back to the sun.  Most digital cameras these days have either a fill flash feature or flash compensation feature that allows you to control the brightness of your flash .  You'll probably have to play around with your settings a bit before you get the result you want, but you'll probably find it well worth the effort.  I know I did.

Finding photos taken with flash in the Shutter Sisters Flickr group pool is like pulling teeth, but I did find this one by Angela (angs*photos), this lovely portrait (with the flash stopped down -1.3) by Kathy (work2snap) and this adorable baby shot by Lawyer Mama [Steph].  How about the rest of you?  Have any flash pointers, or images you want to share in which the flash proved to be your friend?

Sunday
May182008

sunday school: i *heart* bokeh

051808_600.jpg 
"Ooh! LOVE the bokeh!" "That bokeh is just magical!" "Beautiful bokeh!"

How many times have you encountered comments like those while browsing photos on Flickr? If you have no idea what *bokeh* is, or have a vague idea but aren't sure, you're probably not alone. I was pretty confused about the whole thing until I did some research recently, and actually, I'm still confused.

So what did I find out? Well, most simply put, bokeh is the Japanese word for "fuzzy," and it refers to the aesthetically pleasing out-of-focus areas of a photo, often achieved with a wide aperture or a telephoto lens. I have to admit that terms like "spherical aberration" and "circle of confusion" make my eyes glaze over, so I won't get into the technicalities here.  Besides, I'm sure you all have some mad googling skillz.

From what I'm able to gather, there are different types of bokeh. There's the creamy, smooth and silky kind that looks like you wiped that portion of the photo with a sponge. Then there's the kind of bokeh that shows the shape of the aperture--round for a large aperture that's wide open, polygonal for an aperture that's stopped down a couple stops, or even in different shapes if you want to get crafty with paper and scissors. And while there may be a general consensus as to what is and isn't considered good bokeh, I think it's pretty subjective.

Now, I've seen some really lovely bokeh in the Shutter Sisters' pool, so I know we've got a bunch of bokeh enthusiasts in our midst. Bokeh apparently has its own day of the week, not to mention numerous groups on Flickr. If you have a tip for getting really cool bokeh or have some favorite bokeh photos of your own, please share, and tag your photos with the word "bokeh" and submit them to the Shutter Sisters Flickr pool so we can enjoy all the bokeh glory in slideshow format.

P.S. I got the heart bokeh in the photo for this post by cutting out a heart in a circular piece of cardstock (you want it thick enough to block light, so black would probably work best) that would fit in the front of my 50mm f/1.8 lens (which was the perfect lens for this experiment as the glass part of the lens is set far into the lens body).  I suppose you could do the whole lens hood method, but, eh, I was happy enough with the results I got.  A tip for cutting out hearts: if you are a scrapbooker, you already know what to do.  If you are not,  you can run out and buy (or borrow) a heart-shaped hole-puncher-thingie, or you can do what I did.  I took a simple hand-held hole puncher, punched out two circles that were conjoined to create the bosom of the heart, and took sharp scissors to make the pointy bottom of the heart. 

Sunday
May042008

Sunday School: Get Your Flare On

 050408_600.jpg

Speaking of aperture, I admit that I'm a wide-open shooting junkie.  My aperture is normally set to f/1.4 or f/1.8.  I couldn't figure out why anyone would ever want to shoot at a narrower aperture.  Recently, however, I was inspired by this photo of a starry moon (straight off of the camera, no less!) by the talented Rachel Schell to explore the other extreme of the aperture spectrum (the narrow end), and that is how I finally figured out how to get my flare on.

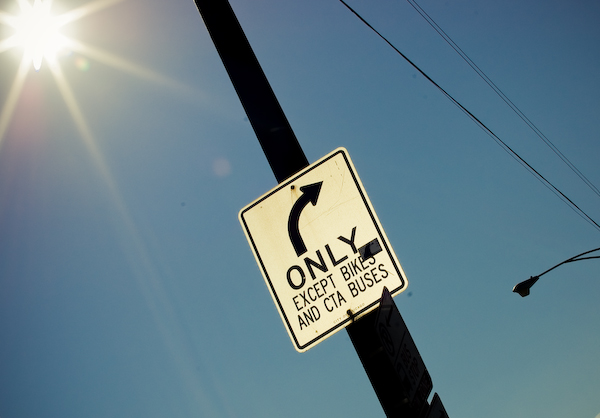
I saw that Rachel took her photo at the narrowest aperture (f/22) and with a 30 second exposure, and it dawned on me that this made perfect sense.  The narrower the aperture, the longer the exposure you can use, and that's how you get those lovely rays in the form of star-shaped flares, instead of the round blobs of light I normally get when shooting directly at a light source.

This little trick took what would've been a boring night shot and turned it into the bit more dreamy and star-filled photo you see above.  I've been having lots of fun with this, especially since I discovered that the technique works great for taking sun flare shots as well.  If you've never tried this before, I highly recommend it.  My tips for night shots would be to use a tripod (or the ground, as I did in my photo above), to set the camera on timer or use a remote to reduce camera shake, and to play around with different combinations of aperture, shutter speed and ISO settings to get the flare and exposure you want.

So how about you all?  Have any interesting flare you'd like to share?  If you happen to try out this technique for the first time, please share your results with us!

Monday
Apr282008

a is for aperture

042808_600%5B2%5D.jpg“There are no rules for good photographs, there are only good photographs.”  – Ansel Adams

I spent this past Saturday morning in a digital photography workshop lead by shutter brothers Jack, a serious amateur photographer, and Al, a professional sports photographer. Opportunities to connect and learn like this with fellow photographers are rare in my small Southern town, so when I heard that the photographers were coming, I noted the event on my calendar with a big, fat Sharpie.

My approach to photography has been primarily artistic vs. a traditional technical approach, though I consumed a photography class in college with a heavy appetite. And while I did learn the technicalities of F-stops and aperture, and the speeds of shutters way back then, I often leaned on an artistic eye in the dark room to turn an okay image into something special. I rarely remembered the formula for chemical soaks, nor did I take the time to document my pinhole camera exposures to simplify the subsequent shot. Numbers and calculations simply didn’t mix with the art of aesthetics for me. I just sort of “felt” that an image was done when it was done.

Even today with my digital SLR, I lean on my auto settings to quickly capture my compositions because I can’t force myself to reference the manual or fiddle with buttons in the presence of a fleeting moment. As a means of controlling light, I keep my flash turned off at all times and follow the rhythm of natural light, shooting in the morning or early evening, feeling confident that if the lighting or contrast isn’t quite right, I can tweak it on my MacBook. But to really mature into a serious photographer, I’ve come to realize that there’s a delicate balance between firing the right and left sides of the brain…like ah, simultaneously. A balance I intend to cultivate.

So when shutter brother Al suggested that I shoot in Aperture Priority setting – giving me control of the size of the aperture (the hole in the camera regulating the amount of light that comes into the camera) and keeping the camera in control of the shutter speed – I made him turn the dial to the “A”.  Large apertures (low f/-numbers) reduce the depth of field, blurring objects behind and in front of the main subject. Small apertures (high f/-numbers) increase depth of field, bringing out details in the background and foreground. Al then pressed on the +/- button to show me how easy it was to increase and decrease the exposure setting simply by turning a control dial in this A-priority mode. The higher the number > the more light let in.  The lower the number  > the less light let in.  Well, now.  That wasn’t so hard.  So I proceeded to play in A-priority mode for the remainder of the weekend increasing and decreasing my depth of field and exposure settings, and comparing the images quickly to see the difference. Suffice it to say, I now can’t imagine shooting any other way.

What about you? Do you shoot with auto or manual settings?  Share your best-lit images in the comments and your tips/tricks for controlling light.